How to Clean iRobot Roomba (i, j, Combo and 600 Series Models)
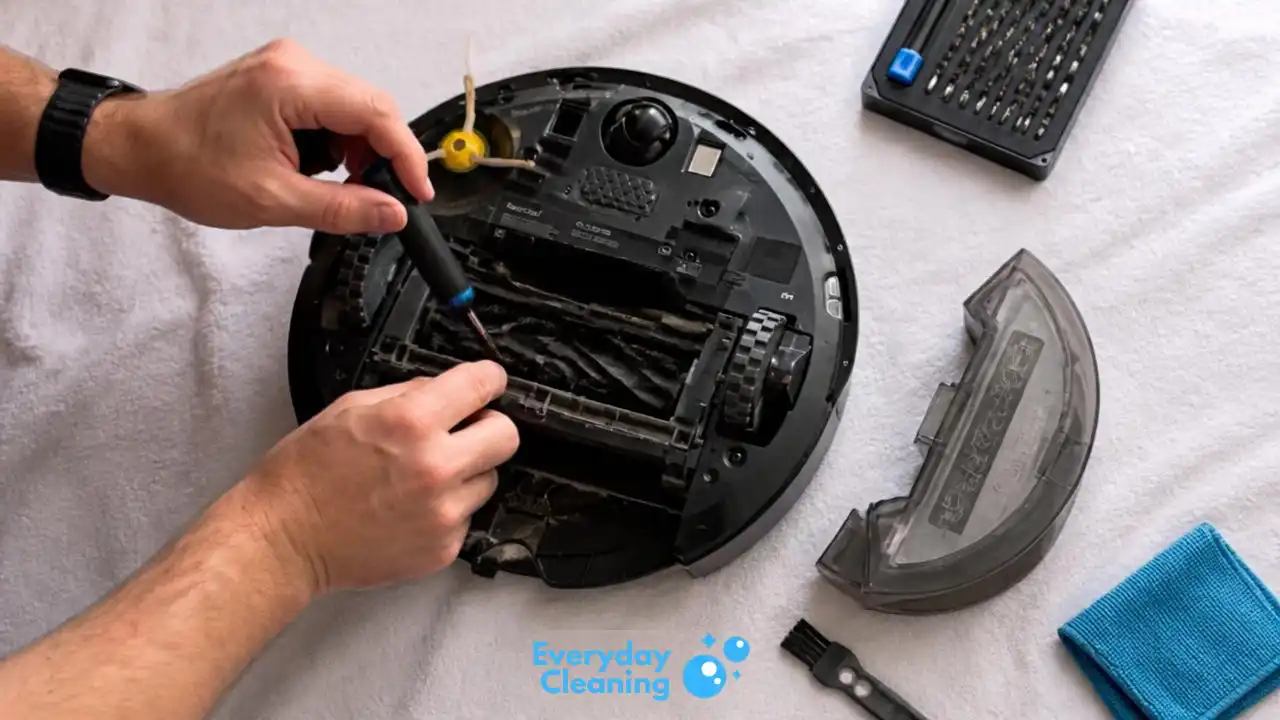
If your Roomba is running slow, missing spots, or stopping mid-run, it probably needs a deep clean. Most of the time the problem is hair wrapped around the brushes and packed under the end caps.
This guide shows you how to clean iRobot Roomba models step by step. The same routine works for the 600 series, i series, j series and Combo models, with a few small differences covered below.
Why a Dirty Roomba Cleans Worse?
A Roomba only picks up what its brushes can reach. When hair wraps around the rollers, they spin slower and stop agitating the floor. The motor works harder, and the whole machine gets weaker.
A packed filter does the same thing to suction. The bin may look half empty, but air can’t flow through. That’s why a Roomba can feel “broken” when it really just needs a cleaning.
What You’ll Need
- A small pair of scissors
- A screwdriver
- A dry microfiber cloth
- A trash can
Before You Start
Turn the Roomba off and take it off the dock. Work over a table or a towel so you can catch loose hair and screws. Keep the trash can close, because you’ll be dumping a lot of hair.
How Often Should You Deep Clean a Roomba?
Empty the bin after every run or two. Check the brushes once a week if you have pets or long hair. Do a full deep clean every two to three months.
Your Roomba will also tell you when it’s overdue. Watch for these signs:
- It runs slower than it used to
- It stops in the middle of a room
- It leaves stripes of dirt or hair behind
- You hear grinding or rattling from the brushes
Any one of these means it’s time for a deep clean now, not later.
How to Clean iRobot Roomba Step by Step
Step 1: Empty the Bin and Clean the Filter
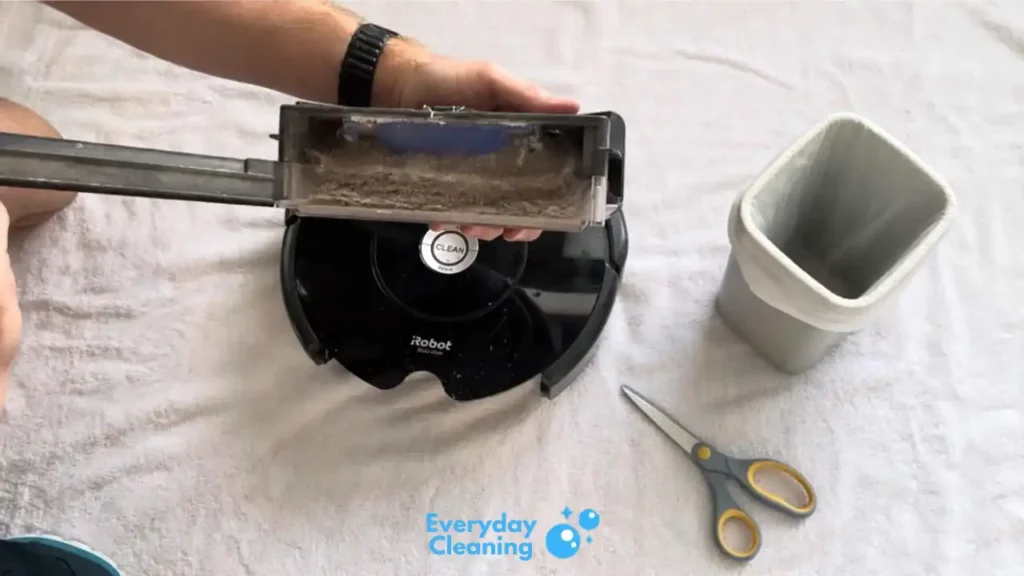
Start with the easy part. Open the bin door and dump everything into the trash can.
Pull the filter out next. Tap it against the can to knock the dust loose, then wipe it off. Keep it dry. Don’t rinse it unless your manual says you can.
Step 2: Flip It Over and Open the Cleaning Head
Turn the Roomba upside down. Look for the yellow tabs on the cleaning head frame.
Push the tabs and the cover pops open. Sometimes it opens wider than you expect, so go slow.
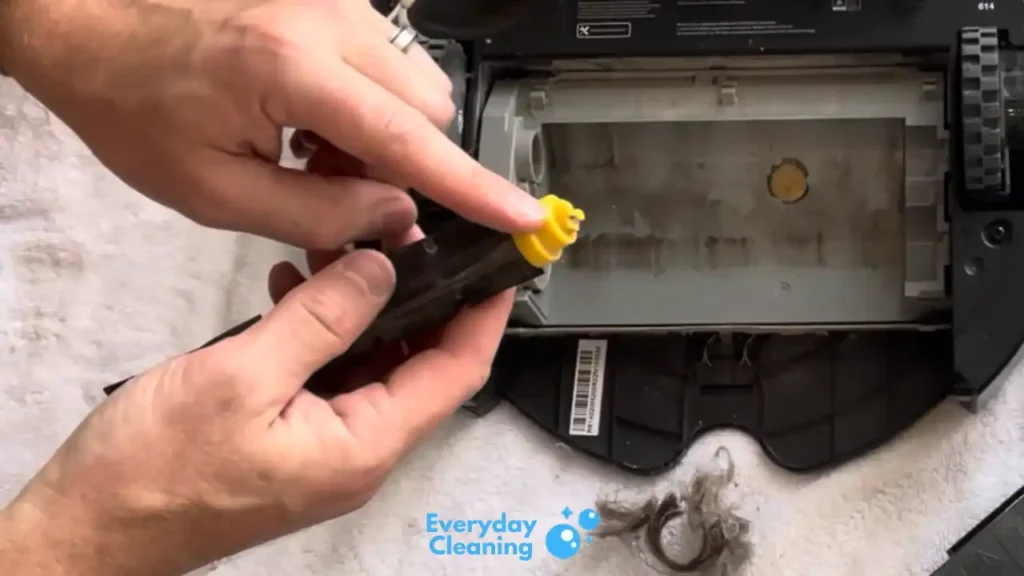
Step 3: Take Out the Brushes
Lift the brushes out and notice how they sit before you pull them. The yellow end rests in a small holder, which makes the reinstall easy.
If you’re worried about forgetting, snap a quick photo with your phone first.
Step 4: Cut the Hair Off the Brushes
Pull off what you can with your fingers. That takes care of dust and loose hair.
Then grab the scissors and cut straight through the hair. Don’t try to pry it off. Cutting is faster and won’t bend the brush.
Work from one end of the roller to the other. Once the hair is cut in a line, it peels away in strips. Pull the strips out and drop them in the trash.
Hair also slides under the small plastic bars on the roller. You may need to cut in a few different spots. This is where dog hair and long human hair both pile up.
Step 5: Pop Off the End Caps and Check Underneath
Each brush has a tab on the end that pops off. Hair and dust hide under it.
Clean that area out before you snap the tab back on.
Take a look down into the brush cavity too. Small bits like lint or paper can get stuck in there and slow the brush down.
Pick out anything you find with your fingers. If something is wedged in tight, use the scissor tip to nudge it loose. A clear cavity lets the brush spin without dragging.
Step 6: Clean Under the Side Brush
Grab a screwdriver and unscrew the side brush. Hair collects underneath it and keeps it from turning.
The side brush sweeps dust toward the suction path. If it can’t spin, your Roomba leaves messy edges along walls and baseboards.
Clear the hair out, then screw the side brush back on. Don’t tighten it too much. Snug is enough.
Step 7: Reassemble and Test the Spin
Put the brushes back the same way they came out. Seat one end first, then drop the other end in.
Spin each brush by hand. It should turn freely with no drag or rubbing.
Snap the cover back on until it clicks. Turning the Roomba around makes this easier. Then slide the filter and bin back in and run a short cycle.
Listen for odd noises during that first run. A smooth hum means you did it right. Rattling or grinding means a brush isn’t seated, so open it up and check again.
Cleaning Tips by Roomba Series
Parts look a little different from model to model. The basic workings are the same on all of them. Check your manual if something doesn’t match what you see.
Roomba 600 Series (675, 692, 694)
The yellow release tabs in the steps above are common on this style of frame. The bin is on the small side, so it fills fast. If you have pets, empty it after every run.
Roomba i Series (i3, i4, i5, i7)
These use two rubber brushes instead of bristles. Hair still wraps around the ends and collects under the end caps. The same routine applies.
Models with a Clean Base empty the bin for you. The brushes and filter still need your hands.
Roomba j Series (j7, j9)
You get the same dual brush setup. Add one more step. Wipe the front camera and sensor windows with a dry microfiber cloth.
A smudged lens can affect how well the robot spots cords and other obstacles.
Roomba Combo Models (j5+, j7+, j9+, Combo 10 Max)
Combo models vacuum and mop, so there is more to maintain. Empty the water tank and take off the mopping pad after each mop run. Let both air dry before you put them away.
If you’re still comparing hybrids, our robot vacuum mop combo tests show how the different models handle real floors.
Don’t Skip the Sensors, Wheels and Charging Contacts
While the Roomba is flipped over, spend one more minute on the rest of the underside.
- Wipe the cliff sensors with a dry cloth
- Pull out the front caster wheel if your model allows it, and clear hair from the axle
- Check the drive wheels for wrapped hair
- Wipe the charging contacts so it docks reliably
Dirty cliff sensors cause a lot of random stopping. This quick wipe fixes it more often than you’d think.
Easy Habits That Keep a Roomba Cleaner Between Deep Cleans
A deep clean goes faster when you keep up with small jobs. None of these take more than a minute.
- Pick up cords, socks and small toys before each run
- Dump the bin as soon as you see it filling up
- Snip any hair you can see on the brushes during your weekly check
- Wipe the sensors and charging contacts once a month
- Keep the dock area clear of dust and clutter
Pets and long hair change the math. If you live with either, do the brush check twice a week and the full routine closer to every two months.
Common Mistakes to Avoid
Most Roomba problems after cleaning come from a few simple slips.
- Prying hair off with your fingers instead of cutting it
- Over-tightening the side brush screw
- Getting the filter wet
- Putting the brushes back in the wrong position
- Skipping the spin test before closing the cover
Frequently Asked Questions
How often should I clean my Roomba?
Empty the bin after every run or two and do a deep clean every two to three months. Pet and long-hair homes need more frequent brush checks, about once a week. If you have long hair at home, some robot vacuums handle long human hair better than others.
Why is my Roomba running slow or stopping?
Hair jammed in the brushes is the most common cause. A full bin or a packed filter can do the same thing. Run through the steps above and test the spin before you assume something is broken.
Do I need to empty the bin every time?
Not every time for a small home, but often enough that it never gets packed full. A full bin cuts suction fast. If dumping the bin gets old, a self-emptying robot vacuum for pet hair takes that job off your plate.
Can I wash the Roomba filter and bin?
Keep the filter dry. Tap it out and wipe it off instead. For the bin, check your manual first, since rules differ by model.
How do I keep a Roomba clean when I have pets?
Pets mean more hair, so check the brushes weekly and the side brush every few weeks. Empty the bin after every run. Our list of robot vacuums for pet owners covers models that cope better with shedding.
Why is my Roomba so loud?
Grinding or rattling usually means hair or debris is stuck in the brushes or side brush. Clean them and listen again. If it’s still noisy, a quiet robot vacuum might suit your home better.