How to Clean a Shark Vacuum Filter (Step-by-Step Guide)
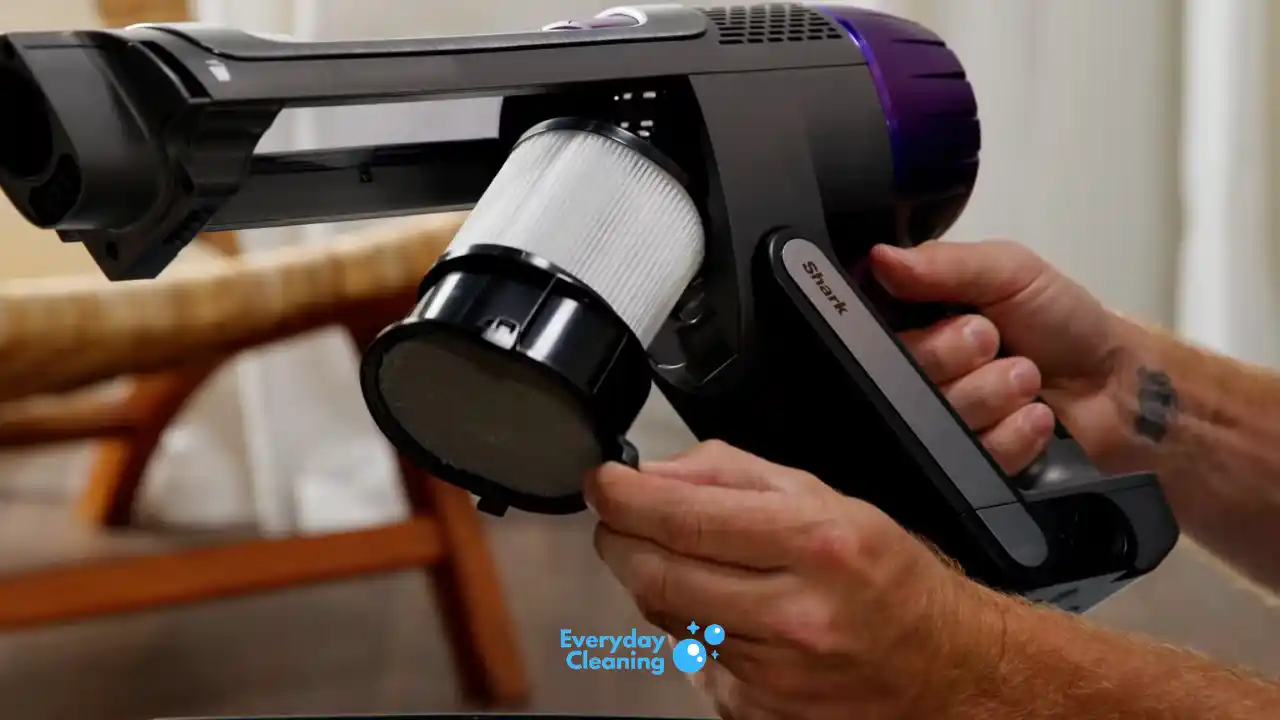
Table of Contents
If your Shark vacuum has lost suction or smells musty when running, a dirty filter is almost always the cause. Cleaning it takes about 10 minutes and can bring your vacuum back to full performance.
What You’ll Need
- Access to a sink with running water
- A dry, clean cloth or paper towel (optional)
- A soft brush (optional, for tapping out dry debris)
- 24 hours of drying time
That’s it. No special cleaning products needed.
Understanding the Different Shark Filter Types
Knowing what filters your Shark uses helps you clean them correctly. Most Shark vacuums ship with two or three filter types depending on the model.
Foam filter. The soft, sponge-like filter that wraps around or sits alongside the felt filter. It catches larger particles before they reach the finer layers. This one is always washable.
Felt filter. A firmer, fabric-style filter that works alongside the foam layer. Together, the foam and felt filters handle most of the everyday dust, dirt, and debris pickup. Also washable.
HEPA filter. Found in most Shark Navigator, Rotator, and higher-end cordless models. HEPA filters capture fine particles including dust mites, pollen, and pet dander. Some Shark HEPA filters are washable. Others are not. Check your model before rinsing. If you vacuum with allergies in mind, this filter matters most. Keeping it clean makes a real difference compared to letting it clog up over months of use.
Not all Shark models have all three. A basic cordless stick might only have foam and felt filters. A Shark Navigator Lift-Away or Rotator will typically have all three. Check the dust cup area and the back panel of your vacuum to see what you’re working with.
How to Find Your Shark Vacuum Filter
Shark vacuums use different filter setups depending on the model. Most models have two or three filters total: a foam filter, a felt filter, and sometimes a HEPA filter.
The foam and felt filters are almost always located near the dust cup. Pop out the dust cup, look inside the housing, and you’ll see them stacked together. On most Shark uprights and cordless models, they pull straight out.
The HEPA filter is usually at the back of the vacuum or in a separate compartment near the motor. Check your model’s user manual if you’re unsure. It takes 30 seconds to find once you know where to look.
How to Clean Shark Vacuum Filter: Step-by-Step
Step 1: Turn Off and Unplug the Vacuum
Before you touch anything, make sure the vacuum is completely off and unplugged. For cordless models, press the power button off and set it down on a flat surface.
Step 2: Remove the Dust Cup
Press the release button on the dust cup and pull it away from the main body. Empty it into the trash before removing any filters. This keeps debris from falling back into the vacuum housing.
Step 3: Pull Out the Foam and Felt Filters
On most Shark models, the foam and felt filters sit together just inside the dust cup opening. Pinch the foam filter and pull it straight out. The felt filter usually lifts out right behind it.
They might look gray or brown depending on how long it’s been since the last cleaning. That’s normal.
Step 4: Tap Out Loose Debris
Before rinsing, tap each filter gently over a trash can to knock out loose dust and debris. This makes the rinsing step faster and keeps your sink from clogging.
Step 5: Rinse with Cold Water
Hold the foam and felt filters under cool running water. Squeeze the foam filter gently while rinsing. Keep rinsing until the water runs clear.
Do not use soap, dish detergent, or any cleaning solutions. Water only. Soap can leave residue in the filter material that damages suction and leaves a smell after drying.
Step 6: Gently Squeeze Out Excess Water
Squeeze the foam filter slowly a few times to push out as much water as possible. For the felt filter, press it gently against the side of the sink. Do not wring or twist either filter too aggressively. The material can tear if you force it.
Step 7: Let Filters Dry Completely (24 Hours)
This is the step most people skip, and it’s the most important one. Set the filters in a dry, well-ventilated area and let them air dry for a full 24 hours before putting them back in.
Putting wet filters back in the vacuum will damage the motor. It can also cause mold or mildew to grow inside the vacuum. If you’re not sure they’re dry, wait longer.
Do not use a hair dryer, microwave, or clothes dryer to speed things up. Heat can warp the filter material and ruin the seal.
Step 8: Clean the HEPA Filter (If Your Model Has One)
Check your Shark’s manual before rinsing the HEPA filter. Some Shark HEPA filters are washable. Some are not.
If yours is washable, rinse it the same way as the foam and felt filters: cold water, no soap, squeeze gently, air dry for 24 hours. If it’s not washable, tap it gently over a trash can to dislodge dust, or use the brush attachment on a separate vacuum to clean the surface lightly.
A non-washable HEPA filter should be replaced every 1 to 2 years depending on use.
Step 9: Reinstall the Filters and Dust Cup
Once everything is fully dry, slide the felt filter back in first, then the foam filter on top. Press them in until they seat firmly. Reattach the dust cup and click it into place.
Run the vacuum for a minute to confirm suction is back to normal.
Filter Cleaning by Shark Vacuum Series
The steps above apply to most Shark models, but the filter locations vary. Here’s a quick breakdown by series so you know where to look.
Shark Navigator Series (NV, UV models). These uprights have the foam and felt filters located just above the dust cup. Remove the cup, look up into the housing, and you’ll see them stacked together. The HEPA filter is typically at the back of the vacuum, behind a panel near the motor.
Shark Rotator Series (NV500, NV800 range). The foam and felt filters are in the same general location as the Navigator. Some Rotator models have a second foam filter higher up in the body. Check the top section near the handle if you suspect a second filter.
Shark ION and IX Cordless Series. The filter sits near the top of the dust cup. Twist off the cup, and the filter is right there. These models usually have one combined filter or a foam and felt stack, but rarely include a washable HEPA.
Shark Vertex and Stratos. Higher-end cordless models that often include a washable anti-allergen HEPA filter. The filter housing is usually accessible from the top of the dust cup assembly.
Shark IQ and AI Robot Vacuums. If you own a Shark robot vacuum, the filter is inside the dustbin. Remove the bin from the dock, open it up, and the filter slides out from the inside. The cleaning process is the same: tap, rinse, dry 24 hours.
If you’re shopping for a new model and want something with simple filter access, robot vacuums have gotten much easier to maintain. Our best robot vacuum cleaner guide covers models with easy-access filters and self-cleaning options.
How Often Should You Clean Your Shark Filter?
Shark recommends cleaning the foam and felt filters once a month under normal use. If you have pets or vacuum daily, clean them every two to three weeks.
If you notice the vacuum losing suction between cleanings, check the filters first. A quick rinse often solves the problem immediately.
The HEPA filter needs less frequent attention. Rinse or replace it every three to six months depending on how often you vacuum and whether you have allergies or pets at home. If anyone in your household has allergies or asthma, keeping the HEPA filter clean is worth the extra attention.
Common Mistakes to Avoid
Putting wet filters back in the vacuum. This is the most common mistake. Always wait the full 24 hours. If you’re not sure, give it another few hours.
Using hot water. Hot water can shrink or warp filter material. Stick with cold or lukewarm water.
Using cleaning products. Soap, vinegar, and baking soda might seem helpful, but they can leave behind residue that clogs the filter and affects suction. Water only.
Forgetting the HEPA filter. The foam and felt filters catch most of the debris, but the HEPA filter does the fine-particle work. Skipping it means your vacuum isn’t actually filtering properly.
Not tapping out debris before rinsing. Skipping this step sends all that dirt down your drain. It also means you’ll spend more time rinsing to get the water to run clear.
When to Replace Your Shark Filters Instead of Cleaning Them
Rinsing can only do so much. If a filter is torn, has holes, or holds a permanent smell even after washing and drying, it’s time to replace it.
Most Shark replacement filters are available on Amazon for under $15 for a set. Your model number (printed on the bottom of the vacuum) will tell you exactly which filters to order.
If you’ve been cleaning the filters regularly and still notice weak suction, the issue might be a blockage somewhere in the hose or brushroll, not the filter. Worth checking before you replace anything.
Frequently Asked Questions
Can I wash a Shark HEPA filter?
Some Shark HEPA filters are washable and some are not. Check the filter itself or your model’s manual. It usually says “washable” or “not washable” right on the filter housing. If yours is washable, rinse with cold water and dry for 24 hours. If it’s not, tap out loose dust or replace it.
How do I know if my Shark vacuum filter is dirty?
The clearest signs are reduced suction and a musty or dusty smell while running. Some Shark models also have a filter indicator light that turns on when a clean is overdue. If the vacuum feels noticeably weaker than usual, the filter is the first place to check.
Can I use my vacuum while the filters are drying?
No. Running your Shark without the filters in place can pull fine dust directly into the motor and cause permanent damage. You’ll need to wait until the filters are fully dry before reassembling and using the vacuum again.
What happens if I forget to clean the filter?
Suction drops first. As debris builds up, airflow through the filter gets restricted and the motor works harder. Over time, this puts extra strain on the motor and can shorten the vacuum’s life. A dirty filter is one of the most common reasons vacuums stop working properly long before they should.
My Shark still smells bad after cleaning the filter. What should I do?
If the smell persists after cleaning and drying the filters, check the brushroll for trapped hair or debris, and empty the dust cup completely. A deep clean of the dust cup with a damp cloth can help. If none of that fixes it, the foam or felt filter may need to be replaced rather than just washed.
How long do Shark vacuum filters last?
The foam and felt filters can last for years if you clean them monthly and handle them carefully. The HEPA filter typically lasts one to two years before replacement is needed. If you notice physical damage like tearing or permanent discoloration, replace them regardless of age.
Is cleaning a Shark filter the same for all models?
The process is nearly identical across Shark uprights, cordless stick vacuums, and navigator models. The main difference is filter location. Cordless models like the Shark ION or IX series have filters near the top of the dust cup housing. Uprights like the Shark Navigator usually have filters just above or inside the dust cup. Check your manual if you’re unsure where yours are located. If you’re looking for a new vacuum that’s easier to maintain, our guide to the best Shark vacuums for allergies covers models with particularly easy filter access.
Can I speed up the drying time?
You can set the filters in a sunny spot or near (not in front of) an air vent to help them dry a little faster. But avoid direct heat from a dryer, hair dryer, or oven. The filter material can warp or shrink. Most filters are dry in 24 hours at room temperature. In a humid climate, give it a bit longer.