How to Clean Pool Tile Without Draining: The Ultimate Guide to Sparkling Clean Tiles

Let me be completely honest with you – cleaning pool tiles without draining requires a totally different approach than what most people think. You can’t just slap on some household cleaner and scrub away when half your tiles are underwater and you need to protect your pool’s water chemistry.
The key is understanding that we’re working with two distinct zones: the waterline tiles (where most buildup occurs) and the submerged tiles. Each zone needs its own specialized approach that won’t contaminate your pool water or waste all that expensive, chemically-balanced H2O.
That white, crusty buildup you see is primarily calcium carbonate – minerals from your pool water that crystallize right at the waterline where evaporation is strongest. The green or black stuff is algae, and it loves to party in both zones. But here’s what I’ve discovered: you can tackle both without draining a single gallon.
Essential Tools for No-Drain Pool Tile Cleaning
Over the years, I’ve built up an arsenal of tools specifically designed for this challenge. Here’s what actually works when you’re keeping that water in place:
Specialized Pool Equipment:
- Pumice stone designed for underwater use
- Telescoping pole with brush attachments
- Pool tile cleaning brush with fine bristles
- Waterline tile scrubber
- Pool-safe enzyme cleaners
- Calcium scale remover (pool-safe formula like AquaDoc (#ad))
Essential Tools:
- Fine-grade pumice stone (softer than regular pumice)
- Plastic scraper with long handle
- Stiff nylon brush that won’t scratch
- Magic eraser sponges (melamine foam)
- Microfiber cloths for waterline cleaning
- Rubber gloves for grip and protection
Safety and Precision:
- Pool test strips (to monitor chemical balance)
- pH testing kit
- Non-slip pool shoes
- Good lighting or underwater LED light
Method 1: The Underwater Pumice Technique
This is my go-to method for submerged tiles, and it’s honestly like magic when done correctly. The key is understanding that pumice works differently underwater – it’s actually gentler and more effective.

Step 1: Choose the Right Pumice Stone Get a pumice stone specifically made for pool cleaning. These are softer than regular pumice and won’t scratch your tiles when used wet. Always test in an inconspicuous area first – I usually pick a spot behind the ladder.
Step 2: Perfect Your Underwater Technique Here’s the game-changer: work in short, controlled strokes while the pumice stays completely submerged. The water acts as a natural lubricant and prevents scratching while helping the pumice grab onto calcium deposits more effectively.
Step 3: Work in Systematic Sections Start at one end of your pool and work systematically. I like to work in 3-foot sections, overlapping slightly to ensure I don’t miss any spots. Keep the pumice stone moving – never let it sit in one place too long.
Step 4: Let the Debris Settle As you work, calcium deposits will flake off and sink to the bottom. Don’t panic about this – we’ll address it at the end. The key is to keep working methodically rather than stopping to clean up as you go.
Step 5: Vacuum and Balance After you’ve finished all the underwater tiles, vacuum the debris from the pool floor using your regular pool vacuum. Then test and adjust your water chemistry, as the removed calcium might slightly affect your pH levels.
Method 2: Waterline Cleaning Without Water Contamination
The waterline is where the heaviest buildup occurs, and it’s also the trickiest area to clean without affecting your pool water. This method keeps chemicals out of your pool while getting those tiles spotless.

Step 1: Lower Water Level Slightly (Optional) If possible, lower your water level by just 2-3 inches using your pool’s drain or a submersible pump. This exposes more of the problem area without actually draining the pool.
Step 2: Use Pool-Safe Tile Cleaner Apply a pool-safe calcium and lime remover directly to the exposed waterline tiles. These products are specifically formulated not to harm your pool water if small amounts drip in. Work in small sections to maintain control.
For the past few years, I’ve been using AquaDoc for my small home pool — one purchase lasts for many uses.
Step 3: The Magic Eraser Technique This is where magic erasers (melamine foam) really shine. Slightly dampened magic erasers can remove waterline buildup without any chemicals at all. They work through gentle abrasion and are completely safe if pieces fall into the water.
Step 4: Immediate Wipe-Down After scrubbing each section, immediately wipe clean with a microfiber cloth. This prevents any cleaning residue from entering your pool water and keeps the process completely contained.
Step 5: Restore Water Level If you lowered the water level, simply refill using your garden hose. The small amount of new water won’t significantly impact your chemical balance.
Advanced Method: The Enzyme Treatment Approach
For those dealing with organic buildup (algae, oils, lotions), enzyme cleaners designed for pools can work miracles without disrupting your water chemistry.
Step 1: Choose Pool-Safe Enzymes Select enzyme cleaners specifically labeled as pool-safe. These break down organic matter without creating harmful byproducts or affecting chlorine levels. I’ve had great success with brands like Natural Chemistry or SeaKlear.
Step 2: Direct Application Method For waterline tiles, apply the enzyme cleaner directly using a spray bottle. For submerged tiles, you can add the enzyme cleaner to a small area and let it work while you scrub gently with a soft brush.
Step 3: Extended Contact Time Enzymes work slowly but effectively. Let the product sit for 15-30 minutes while you work on other pool maintenance tasks. The enzymes are literally eating away at the organic buildup.
Step 4: Gentle Agitation After the contact time, use a soft brush to gently agitate the treated areas. You’ll be amazed at how easily the buildup comes away – no harsh scrubbing required.
Step 5: Natural Integration The beauty of enzyme cleaners is that they can safely enter your pool water. As they continue to work, they’ll actually help keep your entire pool cleaner by breaking down organic contaminants.
Specialized Techniques for Different Tile Types
Not all pool tiles respond the same way to underwater cleaning, and understanding your tile material makes a huge difference in results and preventing damage.
Ceramic and Porcelain Tiles: These are the most forgiving and can handle pumice stone cleaning without worry. They’re also non-porous, so calcium deposits sit on the surface and come off relatively easily with proper technique.
Natural Stone Tiles: Stone tiles require gentler treatment. Use softer pumice and lower pressure. Some stone tiles are naturally rough, which can make it harder to see when they’re truly clean, but also means slight imperfections won’t show.
Glass Tiles: Glass tiles look stunning but show every water spot and mineral deposit. The good news is that deposits don’t bond as strongly to glass, so gentle cleaning with magic erasers often does the trick. Never use pumice on glass tiles.
Mosaic Tiles: The multiple grout lines in mosaic installations can trap more debris, but they also hide minor imperfections. Focus on the tile surfaces first, then address grout lines with a soft brush and enzyme cleaner.
Maintenance Mode
Once you’ve got your tiles clean, keeping them that way is so much easier than starting from scratch. Here’s my maintenance routine that prevents heavy buildup:
Weekly Quick Clean: Every week during regular pool maintenance, run a pumice stone lightly over any tiles showing early calcium buildup. This takes maybe 10 minutes and prevents the deposits from getting established.
Bi-weekly Waterline Attention: Every other week, hit the waterline with a magic eraser during your regular cleaning routine. This catches buildup before it becomes noticeable and keeps your pool looking professionally maintained.
Monthly Enzyme Treatment: Once a month, add enzyme cleaner to your pool according to package directions. This helps break down organic buildup before it becomes visible and makes your regular cleaning much more effective.
Seasonal Deep Clean: Every season, do a complete tile assessment and address any areas that need extra attention. This prevents small problems from becoming major cleaning projects.
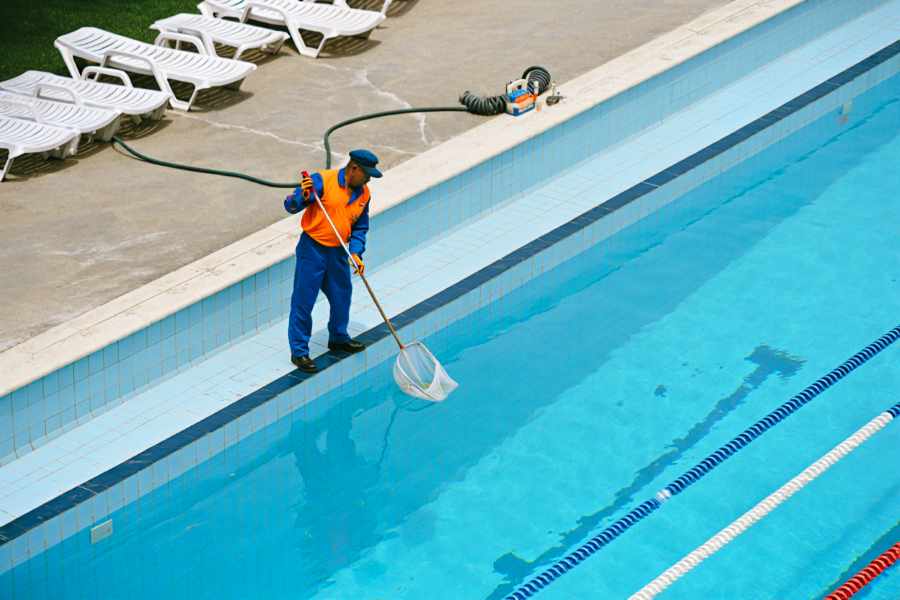
Learning how to clean pool tile without draining has been a game-changer for my pool maintenance routine, and I know it will be for yours too. These methods have saved me countless hours and hundreds of dollars in water costs while keeping my pool looking absolutely pristine.
Remember, consistency is key. Regular maintenance with gentle methods prevents the need for harsh chemicals and aggressive scrubbing. Start with the gentlest method that will do the job, and only escalate to stronger solutions if absolutely necessary.
Your pool should be a source of relaxation and enjoyment, not stress and frustration. With these proven techniques in your cleaning arsenal, you’ll spend less time scrubbing and more time enjoying crystal-clear water surrounded by beautifully clean tiles.