
How to Clean Dry Erase Board: Simple Methods That Actually Work

Table of Contents
Your whiteboard looking more like abstract art than a clean writing surface? You’re not alone. Many people struggle with stubborn marker stains and that annoying “ghosting” effect that makes their dry erase boards look permanently dirty. The good news is that learning how to clean dry erase board properly doesn’t require expensive specialty products – most solutions are probably sitting in your kitchen cabinet right now.
Why Regular Cleaning Matters
Dry erase boards work best when they’re properly maintained. When you let marker residue build up, it becomes harder to erase and creates that ghosting effect where you can still see faint outlines of previous writing. Regular cleaning keeps your board looking professional and ensures markers glide smoothly across the surface.
Method 1: The Alcohol Solution (Best for Regular Maintenance)

This is my go-to method for routine cleaning and works wonderfully for most marker stains.
- Mix your solution: Combine equal parts water and isopropyl alcohol in a spray bottle.
- Spray the board: Cover the entire surface evenly, paying extra attention to stained areas
- Let it sit: Allow the solution to sit for 30 seconds to break down the marker residue
- Wipe clean: Use a microfiber cloth in circular motions, then finish with straight strokes
- Dry thoroughly: Use a clean, dry cloth to remove any remaining moisture
Note: If you only clean the board occasionally, you can use alcohol directly without diluting it for faster and more effective cleaning. However, if you clean it frequently, it’s better to dilute alcohol with water, because using a high concentration (≥ 90%) over time may dry out and dull the board’s surface coating, leading to ghosting.
The alcohol breaks down the marker’s binding agents, making it easier to lift away from the board’s surface.
Method 2: Vinegar Power Clean

When you need something stronger, white vinegar is your friend. It’s especially effective on older stains.
- Create the mixture: Mix one part white vinegar with three parts water
- Apply generously: Spray or apply the mixture across the board
- Wait and wipe: Let it sit for 2-3 minutes, then wipe with a soft cloth
- Rinse if needed: If the vinegar smell is strong, wipe with a damp cloth and dry
Method 3: The Toothpaste Trick for Stubborn Stains
This might sound unusual, but toothpaste is surprisingly effective for tough stains and ghosting.
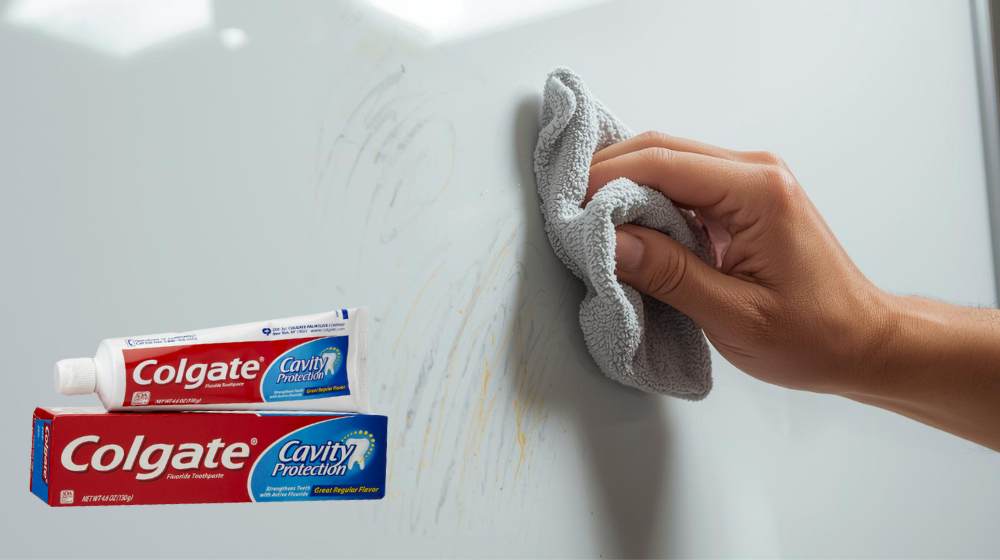
- Choose the right toothpaste: Use whitening toothpaste without gel – the mild abrasives help lift stains
- Apply sparingly: Put a small amount on a damp cloth
- Gently scrub: Work in circular motions over stained areas
- Wipe clean: Remove all toothpaste residue with a damp cloth
- Dry completely: Use a dry cloth to finish
How to Clean Dry Erase Board Stains: Comparison Table
| Method | Best For | Time Required | Effectiveness | Household Items |
|---|---|---|---|---|
| Alcohol Solution | Daily maintenance | 2-3 minutes | High for fresh stains | Rubbing alcohol, water |
| Vinegar Clean | Weekly deep clean | 5 minutes | High for most stains | White vinegar, water |
| Toothpaste Method | Stubborn ghosting | 8-10 minutes | Very high for old stains | Whitening toothpaste |
| Magic Eraser | Emergency cleanup | 3-5 minutes | Excellent for all stains | Magic eraser, water |
Dealing with Permanent Marker Accidents
Sometimes permanent markers end up on your whiteboard by mistake. Don’t panic – you can fix this.
The marker-over-marker method: Draw over the permanent marker with a dry erase marker, then erase both together. The solvents in dry erase markers can help dissolve permanent marker ink.
Alcohol treatment: Apply rubbing alcohol directly to the permanent marker stain, let it sit for a minute, then scrub gently with a cloth.
How to Clean Old Yellowed Dry Erase Boards
Got an old whiteboard that’s turned yellow over time? Don’t throw it away just yet. Age-related yellowing happens when the board’s surface oxidizes, but you can often restore it to near-original condition.
The baking soda paste method:
- Mix baking soda with just enough water to form a thick paste
- Spread the paste evenly across the yellowed areas
- Let it sit for 15-20 minutes
- Scrub gently with a soft brush or cloth in circular motions
- Rinse with clean water and dry thoroughly
For stubborn yellowing: Try the toothpaste method mentioned earlier, but let it sit longer – about 10-15 minutes before scrubbing.
How Often Should You Clean Your Dry Erase Board?
The cleaning frequency depends on how much you use your board, but here’s a practical schedule that works for most people:
Daily users (offices, classrooms): Quick wipe after each use, deep clean weekly Regular users (home offices, kids’ rooms): Clean every 2-3 days, deep clean bi-weekly
Occasional users (kitchen boards, calendars): Clean after each use, monthly maintenance clean
The rule of thumb is simple: the more you use it, the more often it needs attention.
Daily Tips to Keep Your Board Looking Fresh
Small daily habits make a huge difference in keeping your whiteboard pristine:
- Erase immediately: Don’t let marker ink sit on the board for hours or days
- Use the right eraser: Replace worn-out erasers that just smear ink around
- Wipe in one direction: Always finish your cleaning strokes going the same direction for a streak-free finish
- Keep markers capped: Dried-out markers are harder to erase completely
- Rotate your writing areas: Don’t always write in the same spot to prevent uneven wear
The key to keeping any whiteboard looking great is consistency. A quick daily wipe prevents most problems, while weekly deeper cleaning handles anything that builds up over time.
FAQ
How do I remove the faint “ghosting” that remains after erasing?
Ghosting happens when marker residue gets embedded in tiny scratches on the board’s surface. Try the alcohol solution first – spray it on and let it sit for a full minute before wiping. For persistent ghosting, use the toothpaste method or try drawing over the ghost marks with a fresh dry erase marker, then erase immediately.
How can I prevent ghosting to keep my board bright white?
Prevention is all about proper maintenance. Clean your board weekly with the alcohol solution, replace old erasers regularly, and avoid using dried-out markers. If you write the same information repeatedly (like a weekly schedule), try moving it to different areas of the board to prevent permanent ghosting in one spot.
I accidentally used a permanent marker on my whiteboard. How do I remove it?
The easiest fix is to color over the permanent marker with a regular dry erase marker, then erase both together. The solvents in dry erase markers help dissolve permanent ink. If that doesn’t work completely, apply rubbing alcohol directly to the permanent marker lines and scrub gently with a soft cloth.
Can I save a board that’s been written on with non-erasable ink?
Often, yes! Besides the marker-over-marker trick, try acetone or nail polish remover (test in a corner first). Apply it to a cloth and dab the permanent marks – don’t pour it directly on the board. Hand sanitizer with high alcohol content can also work. For really stubborn marks, the magic eraser method is your best bet.
What type of cloth should I use for cleaning?
Microfiber cloths are your best choice because they’re lint-free and won’t scratch the board’s surface. Paper towels work in a pinch, but avoid rough textures. Never use abrasive sponges or steel wool – they’ll create scratches that make future cleaning harder and cause more ghosting.
Do I need to apply any protective coating to my dry erase board?
Most modern whiteboards don’t need additional protection, but if your board is getting heavy daily use, you might consider a whiteboard coating spray every few months. These products can help restore the smooth surface and make cleaning easier. However, regular proper cleaning is more important than any protective coating.


