
How to Clean Shower Tiles (Grout, Soap Scum, and Hard Water Too)

If your shower tiles look dull, streaky, or just a little gross no matter how often you wipe them down. Most people are cleaning the surface but missing what’s actually causing the buildup. Knowing how to clean shower tiles properly — including the grout lines, soap scum, and hard water deposits — makes a huge difference. And honestly, once you get the right routine going, it takes way less effort than you’d think.
Table of Contents
What’s Actually on Your Tiles (It’s Not All the Same)
Before you grab a cleaner and start scrubbing, it helps to know what you’re dealing with. Different types of buildup need different approaches.
Soap Scum
That cloudy, filmy layer on your tiles? That’s soap scum. It forms when the fatty acids in bar soap mix with minerals in your water. It’s not mold, and it’s not super stubborn — but it builds up fast and makes tiles look dingy.
Hard Water Stains and Mineral Deposits
These show up as white or chalky spots, especially around the showerhead, faucet, and lower tile edges. If your water is hard (high in calcium and magnesium), you’ll see these deposits build up over time. They require an acidic cleaner to break down — regular all-purpose sprays won’t touch them.
Mold and Mildew
Dark spots in the grout lines or corners of your shower? That’s likely mold or mildew. It loves damp, warm spaces and can spread quickly. You’ll need a targeted cleaner or a bleach-based product to deal with this one — don’t just scrub it with soap.
Tools and Cleaners You’ll Need
You don’t need a cabinet full of products. Here’s what actually works:
| Problem | Best Cleaner | Best Tool |
|---|---|---|
| Soap scum | Dish soap + baking soda, or a daily shower spray | Non-scratch scrub brush or sponge |
| Hard water stains | White vinegar or citric acid spray | Spray bottle, old toothbrush |
| Mold/mildew in grout | Diluted bleach (1:10) or hydrogen peroxide | Grout brush, old toothbrush |
| General tile cleaning | Mild all-purpose cleaner or baking soda paste | Microfiber cloth or tile brush |
| Deep cleaning (all buildup) | Steam cleaner | Steam cleaner with detail nozzle |
A few things worth keeping on hand: a grout brush (or a firm-bristled toothbrush), a spray bottle, microfiber cloths, white vinegar, baking soda, and a good all-purpose cleaner. If you want to make deep cleaning genuinely easy, a steam cleaner is worth every penny — more on that below.
Step-by-Step Tile and Grout Cleaning Routine
This is the full routine for how to clean shower tiles from top to bottom. Follow these steps in order and you’ll get the best results.
Step 1: Rinse the whole shower first. Run warm water over the tiles for about 30 seconds. This loosens surface dirt and opens up the pores of the grout slightly, which helps cleaners penetrate better.
Step 2: Apply your cleaner. Spray your chosen cleaner generously across the tile surface and into the grout lines. If you’re using a baking soda paste (mix baking soda with a little dish soap and water), spread it directly onto the grout lines with a brush or your fingers.
Step 3: Let it sit. This step is where most people rush and then wonder why the scrubbing isn’t working. Let the cleaner sit for at least 5 minutes — 10 to 15 is better for built-up soap scum or stained grout. For mold, give a bleach solution at least 10 minutes of contact time.
Step 4: Scrub the grout lines. Use your grout brush or toothbrush and work in small circular motions along each grout line. Don’t just swipe — press in and really work the bristles into the channel. Grout is porous, so the grime is sitting inside it, not just on top.
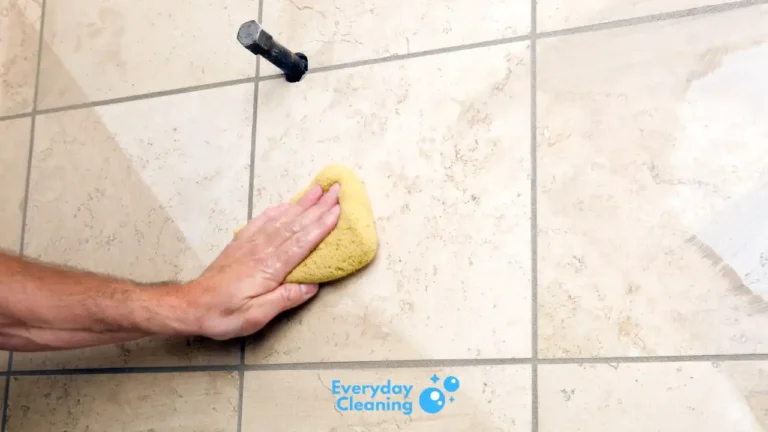
Step 5: Scrub the tile faces. Switch to your scrub brush or non-scratch sponge for the tile surface itself. Work in sections, top to bottom.
Step 6: Rinse thoroughly. Use warm water and rinse everything from top to bottom so no cleaner residue is left behind. Residue left on tiles actually attracts more dirt and can leave a hazy film.
Step 7: Dry the tiles. Wipe down the walls with a squeegee or dry microfiber cloth. This one simple habit cuts down on future soap scum and mold growth significantly.
How to Use a Steam Cleaner on Shower Tiles
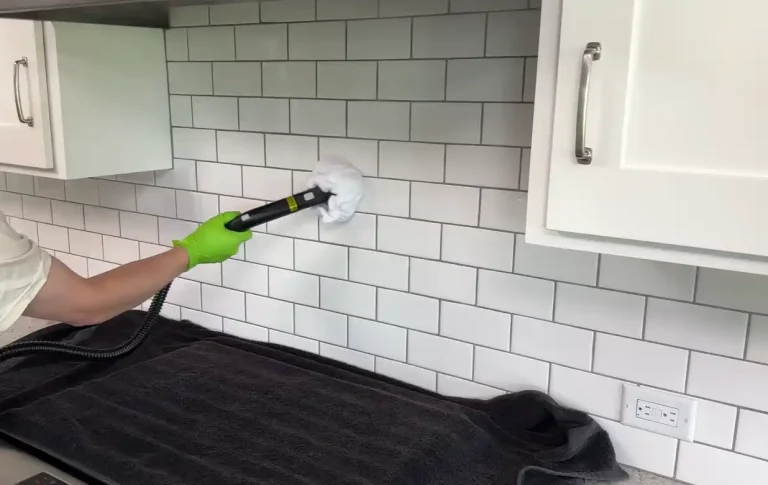
If you haven’t tried steam cleaning your shower tiles yet, it might change your whole perspective on bathroom cleaning. Steam reaches temperatures that dissolve soap scum, loosen mineral deposits, and kill mold and bacteria without any harsh chemicals. It’s especially good for grout.
Here’s how to do it:
Step 1: Fill your steam cleaner’s tank with distilled water if possible (it keeps mineral buildup out of the machine). Let it heat up fully before starting.
Step 2: Attach a small detail nozzle or grout tool if your machine has one. These focus the steam into the grout lines more effectively than a flat pad.
Step 3: Hold the nozzle about one to two inches from the tile surface and move slowly. Don’t rush — the steam needs a moment of contact to do its job.
Step 4: Work in sections, top to bottom. After each section, wipe away the loosened grime with a microfiber cloth.
Step 5: For stubborn grout lines, hold the nozzle directly on the line for a few seconds before moving on. You’ll often see the grime lift almost immediately.
If you’re looking for a machine that handles tile and grout well, check out this guide to the best steam mops for tile floors and grout — it breaks down the features that matter most for this kind of cleaning. And if you want to compare more options across different home surfaces, this roundup that covers baseboards and hard-to-reach areas is worth a look too.
For grout specifically, a handheld unit often gives you better control than a full floor mop. This breakdown of handheld steam cleaners for grout is a solid starting point if you’re shopping around.
How to Tackle Stubborn Hard Water Stains on Shower Tiles
Hard water stains are a whole different battle. Regular scrubbing won’t budge them because they’re mineral deposits — essentially a layer of calcium carbonate that’s bonded to your tile surface. You need acid to dissolve them.
- White vinegar method: Fill a spray bottle with undiluted white vinegar. Spray it directly onto the stained areas and let it sit for 15 to 20 minutes. For heavy buildup, soak a cloth in vinegar, press it against the tile, and leave it there for 30 minutes. Then scrub with a non-scratch brush and rinse well.
- Citric acid spray: Mix one tablespoon of citric acid powder with one cup of warm water in a spray bottle. This is stronger than vinegar and works well for thick mineral deposits. Apply, wait 10 minutes, scrub, and rinse.
- Baking soda boost: For textured tiles where deposits are sitting in small pores, make a paste of baking soda and vinegar (it’ll fizz — that’s fine). Apply it to the stained area, let it sit, then scrub with a toothbrush. Rinse thoroughly.
One thing to keep in mind: if you have natural stone tiles like marble or travertine, skip the vinegar and citric acid. Acid can etch the surface. Use a pH-neutral cleaner made for natural stone instead.
For really heavy mineral scale that won’t budge with home remedies, a steam cleaner combined with a citric acid pre-treatment can work well. The acid softens the deposit and the steam blasts it loose. If you’re curious about high-pressure steam options for this kind of job, this comparison of steam cleaners for tile floors covers models with enough pressure to handle mineral buildup effectively.
Keeping Shower Tiles Clean Longer: Weekly Habits That Actually Work
Knowing how to clean shower tiles is one thing. Keeping them clean without spending your whole Saturday scrubbing is another. These small habits make a big difference.
- Squeegee after every shower. This is the single most effective thing you can do. Run a squeegee down the walls for 30 seconds when you’re done. It removes the water that causes soap scum and mineral buildup before it can dry and stick.
- Spray a daily shower spray. Keep a bottle of daily shower spray on the shelf. After you squeegee, mist the tiles lightly. Most of these sprays work by leaving a thin protective coating that repels soap and minerals. You don’t rinse them off.
- Leave the bathroom fan running. After a shower, keep the exhaust fan going for at least 15 to 20 minutes. Reducing humidity slows mold and mildew growth in grout dramatically.
- Do a quick weekly wipe-down. Once a week, give the tiles a quick spray and wipe with a microfiber cloth. It takes five minutes and prevents the buildup that turns into a 45-minute scrubbing session.
- Reseal grout once a year. Grout sealer fills in the porous surface of grout so that soap, minerals, and mold have a harder time penetrating. Apply it once a year (it takes about 20 minutes for a shower) and your grout will stay cleaner and lighter-colored with much less effort.
- Switch from bar soap to liquid body wash. Bar soap is the main culprit behind soap scum because of its fatty acid content. Liquid body wash doesn’t leave the same residue, so your tiles stay cleaner between cleanings. It’s a small swap with a noticeable impact.
If you’re doing a full bathroom refresh and want to get the floors looking just as good as the walls, you might find this overview of steam cleaners specifically for grout cleaning helpful — it covers what to look for when tackling floor grout lines where grime really tends to collect.



2 Comments
Comments are closed.