How to Clean a Dryer Vent on the Roof Without Going on the Roof: Smart Solutions That Actually Work

Before we dive into the how-to part, let’s quickly talk about why this matters so much. When your dryer vent gets clogged with lint, dust, and debris, it’s not just about your clothes taking forever to dry (though that’s annoying enough). We’re talking about serious fire hazards, increased energy bills, and potential damage to your expensive dryer.
A blocked vent forces your dryer to work overtime, which means it’s using way more electricity than it should. Plus, when hot, moist air can’t escape properly, it creates the perfect conditions for lint to build up even faster – and lint is basically tinder waiting for a spark.
If you’ve been putting off this essential maintenance task because the thought of getting on your roof makes you nervous, you’re definitely not alone. Today, I’m going to walk you through several proven methods that will help you tackle this job from the safety of solid ground.
Method 1: The Extended Brush System (Most Effective)
This is honestly my favorite approach because it gets the job done thoroughly without requiring any ladder work or roof access.
What You’ll Need:
- Dryer vent cleaning kit with flexible rods (at least 25-30 feet)
- Drill with variable speed settings
- Drop cloths or tarps
- Vacuum with strong suction
- Flashlight or headlamp
- Work gloves
Step-by-Step Process:
- Start by disconnecting your dryer from the power source – safety first, always. Next, you’ll want to pull the dryer away from the wall so you can access the vent connection behind it. This is where you’ll be working from, so make sure you have enough space to maneuver comfortably.
- Disconnect the dryer vent hose from the wall outlet. You might find some lint buildup right here already, so have your vacuum ready to clean this area thoroughly before you start the main cleaning process.
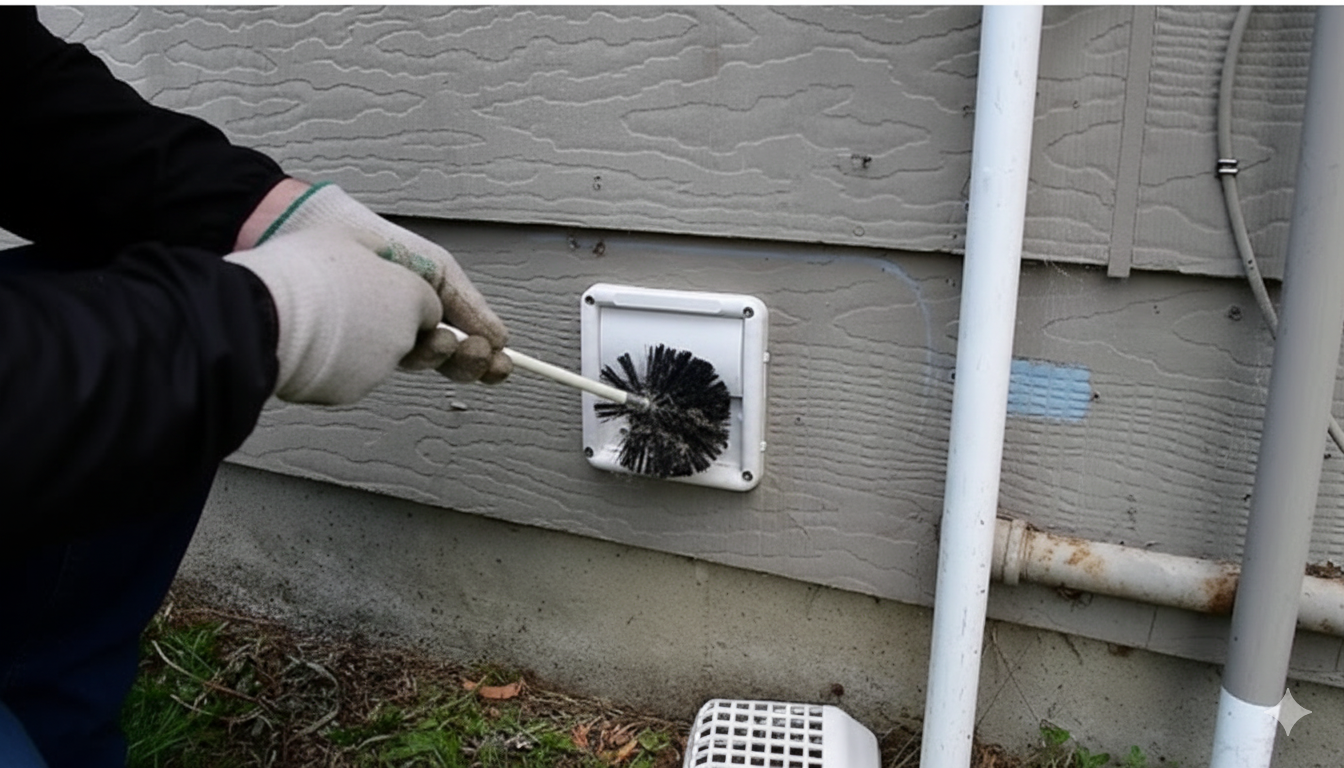
- Now comes the interesting part – you’re going to feed your cleaning brush system up through the vent opening from inside your house. The flexible rods connect together, allowing you to extend the brush system all the way up through the ductwork to the roof exit point.
- Attach your brush head to the first rod, then connect your drill to the other end. As you slowly feed the brush system up through the vent, run the drill at a moderate speed. The rotating brush will knock loose all that accumulated lint and debris as it travels through the ductwork.
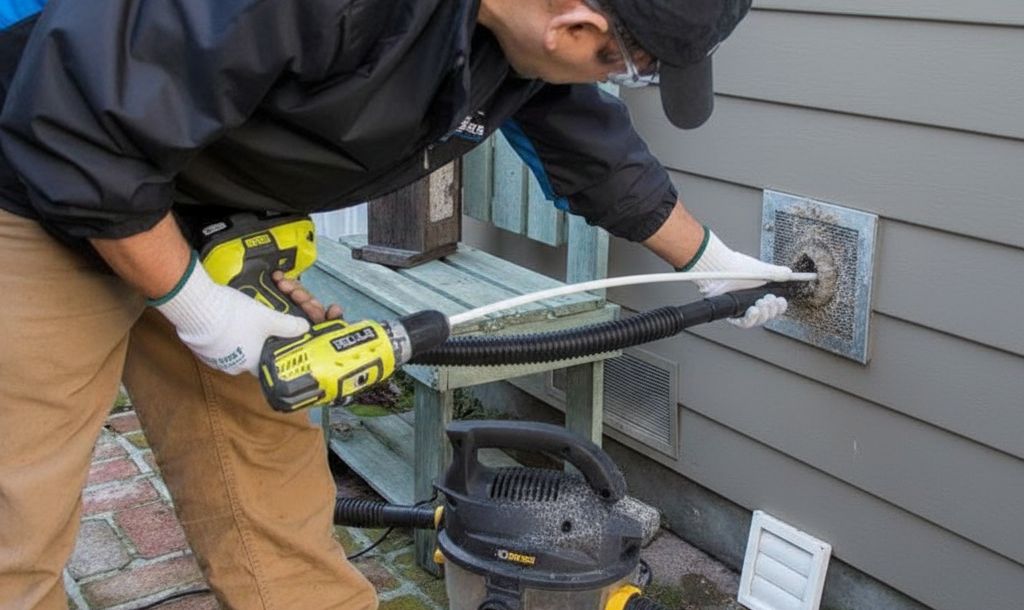
- Work in sections of about 3-4 feet at a time. Push the brush system up, run the drill for about 30 seconds while gently moving it back and forth, then advance to the next section. This methodical approach ensures you’re really getting everything loosened up.
- When you feel the brush system reach the roof exit (you’ll feel less resistance), spend a bit more time working that area since it tends to collect the most debris. The brush will push everything back down toward your end, which is exactly what we want.
The Power of Reverse Airflow
Here’s a trick that many people don’t know about – you can use your leaf blower to create reverse airflow that helps push debris out of the roof vent.
How to Do This Safely:
With your dryer vent cleaning kit still in place, carefully remove the brush head and replace it with a leaf blower adapter (these usually come with professional cleaning kits). If you don’t have an adapter, you can create a seal using duct tape around your leaf blower nozzle.
Position the leaf blower at the interior vent opening and run it for short bursts of about 10-15 seconds at a time. This reverse airflow will push any remaining lint and debris out through the roof exit, which is much more effective than trying to pull everything back through the entire duct system.
Make sure someone is watching from the ground level to confirm that debris is actually coming out of the roof vent. If you don’t see anything after several attempts, you might need to go back to the brush method to break up stubborn blockages.
Method 2: Professional-Grade Vacuum Approach
Sometimes the brush method isn’t quite enough, especially if you’re dealing with really compacted lint or if your ductwork has multiple bends that make brush navigation tricky.
For this method, you’ll need a shop vacuum with strong suction capability – we’re talking at least 5-6 horsepower. The regular vacuum cleaner from your living room just won’t cut it for this job.
The Process:
- Create a seal around your vacuum hose at the interior vent opening using duct tape or a specialized adapter. You want to minimize air leaks so all the suction power is directed up through the ductwork toward the roof exit.
- Run the vacuum for extended periods – we’re talking 10-15 minutes at a time with breaks to prevent overheating. The sustained suction will gradually pull loose lint and debris down from the roof exit area.
- While the vacuum is running, you can enhance the process by using a plumber’s snake or similar flexible tool to agitate debris from the interior end. This combination of suction and mechanical agitation is surprisingly effective at clearing stubborn blockages.
Signs Your Cleaning Method Is Working
You’ll know your efforts are paying off when you see several clear indicators that airflow has improved significantly.
First, you should notice debris coming out of the exterior vent during the cleaning process – this is exactly what we want to see. Second, your dryer should start performing noticeably better within the first few loads after cleaning, with clothes drying faster and the dryer itself not getting as hot during operation.
The exterior vent flap should open fully when the dryer runs and close completely when it’s off. If you still see lint accumulation around the exterior vent after your cleaning session, you might need to repeat the process or try a different method.
Learning how to clean a dryer vent on the roof without going on the roof isn’t just about convenience – it’s about maintaining your home safely and efficiently. With the right tools and techniques, you can keep your dryer vent system clean and functional without ever leaving solid ground.
Remember, regular maintenance prevents major problems, so don’t wait until your dryer stops working to tackle this important task. Your clothes will dry faster, your energy bills will be lower, and most importantly, you’ll have peace of mind knowing you’ve eliminated a serious fire hazard from your home.