How to Use a Steam Cleaner in the Bathroom (Every Surface Covered)

Knowing how to use a steam cleaner in the bathroom correctly makes a huge difference. It’s not just about blasting hot steam everywhere and hoping for the best. Each surface needs a slightly different approach, and the right attachment does most of the heavy lifting.
This guide walks you through everything — from safety basics to step-by-step instructions for every surface, plus the best attachments to use and how often to do it.
Table of Contents
Why Steam Cleaning Works So Well in the Bathroom
Steam cleaners produce dry steam at temperatures between 200°F and 300°F (roughly 93°C to 150°C). At that heat, bacteria, mold spores, and soap scum don’t stand a chance. The steam penetrates grout lines, lifts buildup from tile surfaces, and sanitizes without leaving behind any chemical residue.
Compare that to your average bathroom spray cleaner, which often just moves grime around unless you’re scrubbing hard. Steam loosens it first, so wiping becomes effortless.
It’s also a win if anyone in your household has allergies or sensitive skin. No fumes, no residue, no worrying about what’s left behind on surfaces your kids or pets might touch. If that’s a concern for you, it’s worth checking out guides on steam cleaners chosen specifically for allergy-sensitive homes — there are some great options built with that in mind.
Safety Tips Before You Start
- Steam cleaning is safe, but a little preparation goes a long way.
- Let the machine heat up fully. Most steam cleaners take 5 to 10 minutes to reach operating temperature. Don’t start cleaning before it’s ready — you’ll just get wet, lukewarm steam that doesn’t sanitize properly.
- Never aim steam at yourself or others. The steam that comes out is hot enough to cause burns. Keep the nozzle pointed at surfaces only, and be especially careful when working around the toilet or in tight corners.
- Keep the bathroom ventilated. Open a window or turn on the exhaust fan. Steam adds moisture to the air, and in an already humid bathroom, that can encourage mold growth if the room doesn’t dry out properly afterward.
- Check your surfaces first. Most bathroom materials handle steam well, but if you have natural stone like marble, be cautious. High heat can damage the sealant on some stone tiles. When in doubt, test a small inconspicuous spot first.
- Use distilled water when possible. Tap water works, but mineral deposits can build up inside the machine over time. Distilled water keeps your steam cleaner running longer and producing cleaner steam.
How to Use a Steam Cleaner in the Bathroom: Step-by-Step
Step 1: Fill the Tank and Heat Up
Fill your steam cleaner’s water tank with distilled or filtered water. Don’t overfill — check the max line. Plug it in and let it heat up fully before you touch anything. While you’re waiting, do a quick pre-rinse of the toilet bowl and wipe off any loose debris from surfaces. It’s much easier to steam clean when you’re not fighting through layers of loose dust or hair.
Step 2: Start With the Toilet
The toilet is the most bacteria-heavy surface in the bathroom, so it makes sense to tackle it first while your attachments are still clean.
Attach the detail nozzle or a small brush head. Start from the outside top of the tank and work your way down. Hit the handle, the sides of the tank, and the base where it meets the floor. Then move to the seat and lid — both sides.
For the bowl itself, use the curved nozzle or a jet attachment if your machine has one. Direct the steam under the rim first, where bacteria and limescale hide. Then work around the bowl. You don’t need to scrub hard — the steam does the loosening and the wipe-down is quick. Follow up with a toilet brush for the bowl interior, and a microfiber cloth for all the outside surfaces.
Step 3: Tackle the Sink and Faucets
Soap scum and toothpaste residue build up on sinks faster than almost anywhere else. Use a small nozzle or detail brush to steam around the faucet base, handles, and the drain area. These spots trap grime in the tiny gaps where a cloth can’t reach.
For chrome or brushed nickel faucets, steam works beautifully — it lifts water stains and soap film without scratching. Wipe immediately after steaming with a dry microfiber cloth. That final wipe is key. If you leave the moisture sitting, you’ll get new water spots as it dries.
Run the steam around the basin itself, paying attention to the edges where the sink meets the countertop. Grout or caulk lines in this area often harbor mold, and steam hits those spots better than any spray cleaner.
Step 4: Tile Walls and Shower Panels
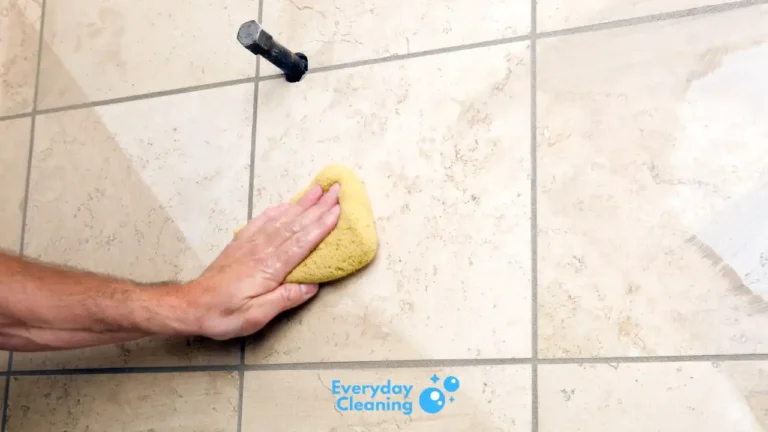
Switch to a larger flat head or rectangular pad attachment for wall tiles. Work in sections from top to bottom so any loosened grime runs down and doesn’t fall onto areas you’ve already cleaned.
Hold the attachment slightly away from the tile surface and move it in slow, steady passes. You’ll see the surface change as the steam lifts soap scum and hard water deposits. Follow each section immediately with a dry microfiber cloth or squeegee.
For shower doors or glass panels, a flat attachment works well. Steam dissolves soap scum on glass surprisingly quickly. Finish with a squeegee to get a streak-free result.
Step 5: Grout Lines
This is where steam cleaning really earns its keep. Grout is porous, which means it absorbs soap, body oils, and water over time — and that’s exactly what causes that grimy grey or orange discoloration.
Attach a narrow brush or grout-specific tool if your machine came with one. Run it slowly along each grout line, giving the steam a moment to penetrate before moving on. For stubborn staining, go over the line twice.
Follow up immediately with a stiff-bristle grout brush and wipe away the loosened grime. You’ll be genuinely surprised at how much comes off. If you want to go deeper on this, our guide on the best steam cleaners for grout covers the tools that work best for this specific job and what to look for in a machine.
Step 6: Floor Tiles
For bathroom floors, attach the floor head or a flat mop pad. Work from the far corner toward the door so you’re not stepping on areas you’ve already cleaned.
Move slowly — faster isn’t better here. Give the steam time to do its job on each section before you move the head. Pay extra attention to the grout lines between floor tiles and the corners where the floor meets the wall. Those spots collect grime quickly and are easy to skip when you’re rushing.
If your bathroom has tile floors that extend into other areas of the home, it might be worth bookmarking this breakdown of steam mops designed specifically for tile and grout — different machines suit different layouts.
Best Attachments for Each Bathroom Surface
Using the right attachment is honestly half the battle. Here’s a quick reference:
| Surface | Best Attachment | Why It Works |
|---|---|---|
| Toilet (outside) | Detail nozzle or small brush | Gets into tight gaps around buttons, hinges, and base |
| Toilet bowl | Curved jet nozzle | Directs steam under the rim where bacteria hides |
| Faucets and handles | Detail nozzle | Reaches around fixtures without scratching chrome |
| Sink basin | Small brush or flat nozzle | Loosens soap scum and lifts caulk-line mold |
| Wall tiles | Rectangular flat pad | Covers larger areas evenly with consistent steam contact |
| Grout lines | Narrow grout brush | Penetrates porous grout to lift embedded grime |
| Glass shower doors | Flat squeegee attachment | Dissolves soap film and leaves glass streak-free |
| Floor tiles | Floor mop head | Distributes steam evenly across a flat surface |
Most steam cleaners come with a starter set of attachments. If yours didn’t include a grout brush or detail nozzle, they’re usually available separately and worth picking up. A good handheld steam cleaner with a grout attachment is especially handy in the bathroom since it’s easy to maneuver in small spaces.
How to Use a Steam Cleaner on Bathroom Walls Without Damaging Anything
One question that comes up a lot is whether steam can damage painted walls or the grout sealant between tiles. The short answer: ceramic and porcelain tiles are totally fine. Sealed grout is generally fine too, though steam over time can slowly degrade certain sealants — so you may need to reseal grout once a year if you steam clean regularly.
For painted walls (not tiled), keep the steam cleaner moving and don’t hold it in one spot. Sustained heat can cause paint to bubble. Test a hidden area first and you’ll know quickly if it’s safe.
Natural stone tiles like marble or travertine are the exception. Steam can break down the sealant that protects them. If you have stone in your bathroom, use a lower steam setting or skip steam on those surfaces entirely and use a stone-safe cleaner instead.
How Often Should You Steam Clean the Bathroom?
For most households, a full steam clean of the bathroom every two to four weeks is plenty. That frequency keeps soap scum from building up, prevents mold from taking hold in grout lines, and makes each session quicker because you’re maintaining rather than deep cleaning.
If you have a large family, multiple people sharing one bathroom, or high humidity in your home, you might bump that up to every one to two weeks, especially for the toilet and tile surfaces.
The grout deserves a little more attention. Even if you steam clean regularly, doing a focused grout session every month or so helps keep discoloration from setting in permanently. If you’re seeing persistent staining, it’s worth looking at whether your grout needs to be resealed, or whether a more powerful machine would help. Some readers find that a compact steam cleaner is perfect for bathroom-only use since it heats up faster and is easier to store.
Between full steam sessions, a quick wipe-down of the sink and toilet with a damp cloth two or three times a week goes a long way. Steam cleaning works best when you’re not battling weeks of built-up grime every time.
Quick Tip: Work Top to Bottom, Always
Whatever surface you’re cleaning, always work from top to bottom and from the back of the room to the door. Loosened grime, steam condensation, and drips all fall downward, so if you clean the floor first and then do the walls, you’ll just be re-dirtying the floor. It sounds simple, but sticking to this order saves you from doing extra work every single time.
The same logic applies within each surface. On the toilet, start at the top of the tank and finish at the base. On the wall tiles, start at the top row and work your way down. On the sink, start with the faucet (highest point) and finish with the drain area.